
Adding a GeoTiff
The GeoTIFF is a widely used geospatial raster data format. It is composed of a single file containing both the data and the georeferencing information (not to be confused with the .tiff/.tfw/.prj file triplet, which is considered a “world image” file in GeoServer). This section provides instructions to add and publish a GeoTIFF file.
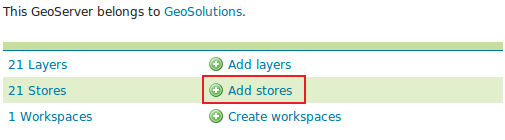
Open the web browser and navigate to the GeoServer Welcome Page.
Select Add stores from the interface.
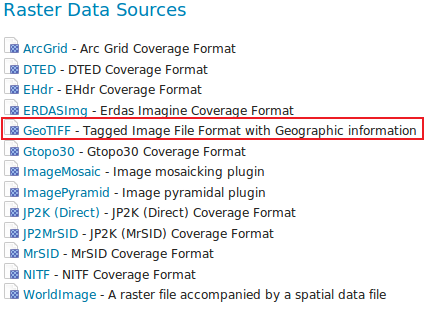
Select GeoTIFF - Tagged Image File Format with Geographic information from the set of available Raster Data Sources.
Specify a proper name (as an instance,
13tde815295_200803_0x6000m_cl) in the Data Source Name field of the interface.Click on browse link in order to set the GeoTIFF location in the URL field.
Note
The 13tde815295_200803_0x6000m_cl.tif is located at
$TRAINING_ROOT/data/user_data/aerial/13tde815295_200803_0x6000m_cl.tif(on Windows%TRAINING_ROOT%\data\user_data\aerial\13tde815295_200803_0x6000m_cl.tif)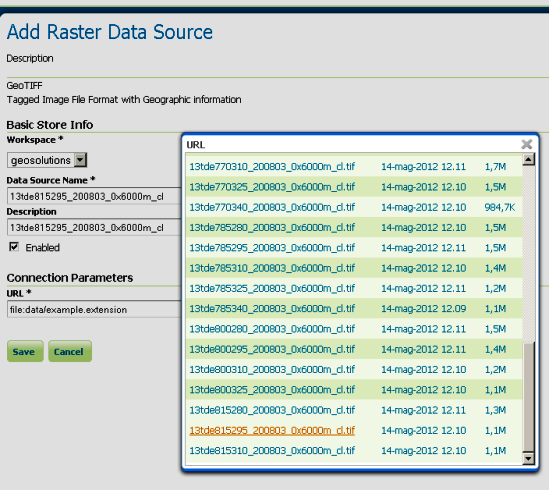
Click Save.
Publish the layer by clicking on the publish link.

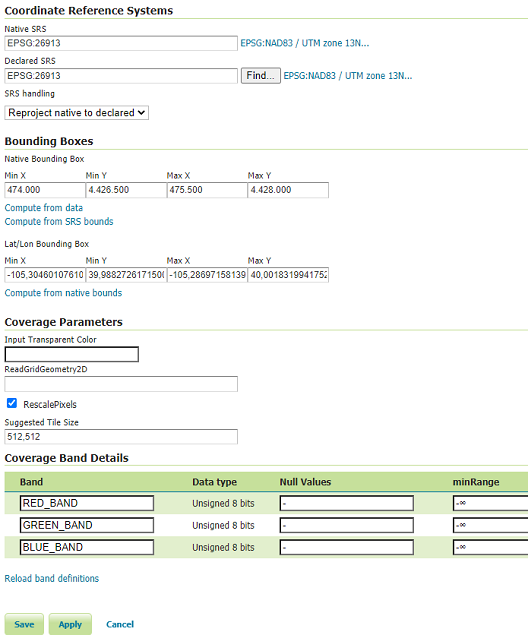
Check the Coordinate Reference Systems and the Bounding Boxes fields are properly set and click on Save.
At this point the GeoTIFF is being published with GeoServer. You can use the layer preview to inspect the data.
