
Raster and Conversion Processes
Through the Raster Processes the WPS is able to execute operations and computations against gridded data sets.
Likely for the Vectorial Processes, those can be seen as an improvement/extension of the WCS, aka “All you wanted WCS to do for you but it never wanted to ...”
Examples of what we can do with the Raster Processes are:
Add/Multiply; add and multiply two rasters (waiting for full algebra to be implemented)Crop; crop a coverage based on the specified cutting geometryRangeLookup; classify raster image based on a set of ranges ([min,max] -> value)ScaleCoverage; rescale and translate a given rasterStyleCoverage; apply a SLD style to a raster, getting back a styled (but still georeferenced) oneGeorectify; turn a non geo-referenced coverage into one based on ground control points
Raster Processes
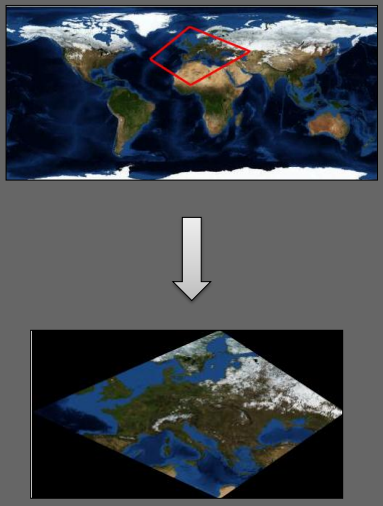
We are going now to execute a simple exercise, trying to crop-out an internal raster layer and get back the result.
We will execute a gs:CropCoverage process over a raster layer, providing a polygonal shape.
gs:CropCoverage example
gs:CropCoverage
The gs:CropCoverage process allows to clip a raster into another one provided a geometry shape. The process works on external sources too, not only GeoServer internal layers, differently from the WCS.
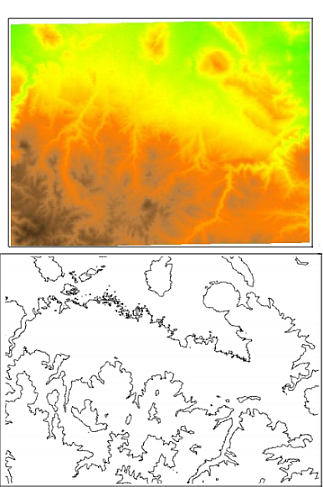
Starting from the full geosolutions:usa raster, representing the USA
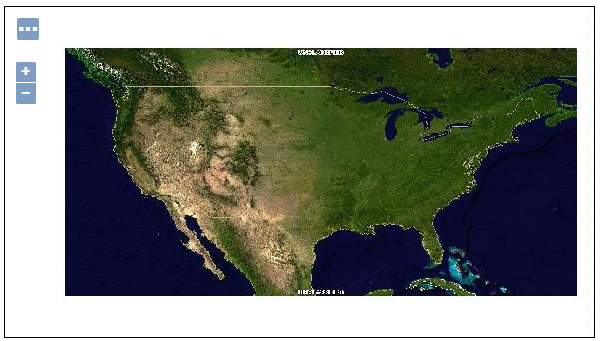
we will issue the WPS gs:CropCoverage process to get back a clipped image to a smaller polygonal area
Once started the GeoServer, go to the
Demo WPS Request Builderinterface, and selectgs:CropCoveragefrom the firstcombo-box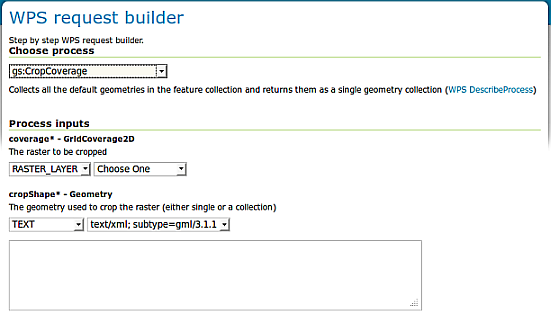
Demo WPS Request Builder interface for gs:CropCoverage process
Select the
RASTER_LAYERgeosolutions:usaand for the first input, the geometry, select the typeapplication/WKTand insert the followingPOLYGONinto thetext-areaPOLYGON((-99.65571 48.60102, -80.83055 37.17146, -98.44552 30.31373, -113.50564 41.07096, -99.65571 48.60102))
Note
The coordinates of the
POLYGONare expressed in the nativeCRSof the coverage, in this caseEPSG:4326.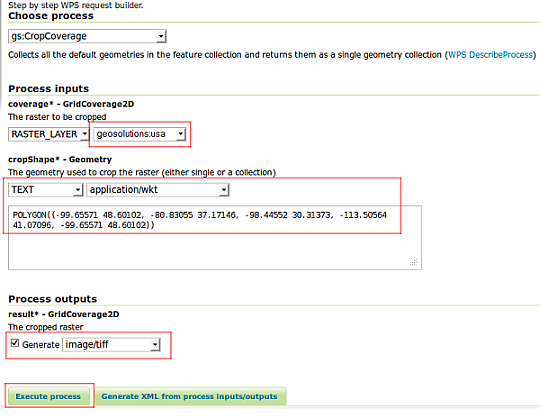
Demo WPS Request Builder interface for gs:CropCoverage process - input parameters
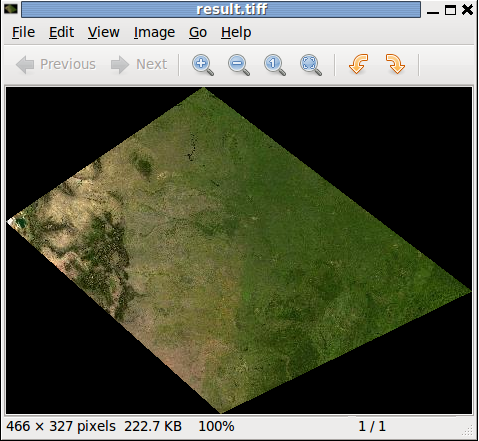
Click on the
Execute Processbutton in order to get back the clipped Coverage inimage/tiffformat
Conversion Processes
A Conversion Process allows us to extract Vectorial Features out from Rasters.
- Examples of
Conversion Processare: Contour; extracts isolines given a set of levels or a intervalRasterAsPointCollection; extracts one point for each cell with band contents as attributesPolygonExtraction; extracts uniform polygons from raster, eventually given a set of value rangesRasterZonalStatistics; given a raster and a polygonal compute min/max/sum/avg/stddev of the cells falling in each polygon return an augmented polygonalVectorToRaster; rasterizes vectors keeping a chosen attribute (a CQL expression eventually) as the band value
We will now execute a gs:Contour process over a raster DEM layer in order to get back the isolines on a set of levels.
gs:Contour example
gs:Contour
Once started the GeoServer, go to the
Demo WPS Request Builderinterface, and selectgs:Contourfrom the firstcombo-box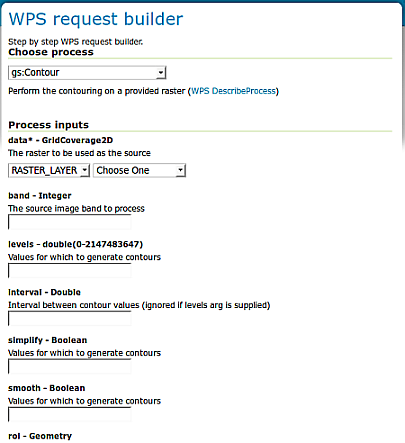
Demo WPS Request Builder interface for gs:Contour process
Select the
RASTER_LAYERgeosolutions:demfor the firstcombo-boxWarning
We need to provide more than one
input level, however we cannot providemulti-valuedinputs using the current Demo WPS Request Builder. We must therefore let the Demo Builder provide a template Execute Process XML template, which we will manually modify later.Insert on the
levelstext-boxthe value1200and selecttype=text/xml; subtype=wfs-collection/1.0as output format for the result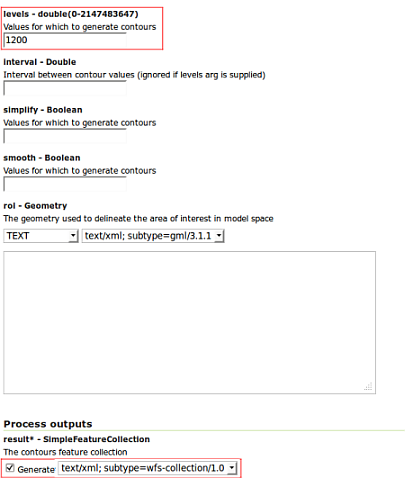
Click on the
Generate XML from process inputs/outputsbutton, in order to get back the following Execute Process XML<wps:Execute version="1.0.0" service="WPS" xmlns:xsi="http://www.w3.org/2001/XMLSchema-instance" xmlns="http://www.opengis.net/wps/1.0.0" xmlns:wfs="http://www.opengis.net/wfs" xmlns:wps="http://www.opengis.net/wps/1.0.0" xmlns:ows="http://www.opengis.net/ows/1.1" xmlns:gml="http://www.opengis.net/gml" xmlns:ogc="http://www.opengis.net/ogc" xmlns:wcs="http://www.opengis.net/wcs/1.1.1" xmlns:xlink="http://www.w3.org/1999/xlink" xsi:schemaLocation="http://www.opengis.net/wps/1.0.0 http://schemas.opengis.net/wps/1.0.0/wpsAll.xsd"> <ows:Identifier>gs:Contour</ows:Identifier> <wps:DataInputs> <wps:Input> <ows:Identifier>data</ows:Identifier> <wps:Reference mimeType="image/tiff" xlink:href="http://geoserver/wcs" method="POST"> <wps:Body> <wcs:GetCoverage service="WCS" version="1.1.1"> <ows:Identifier>geosolutions:dem</ows:Identifier> <wcs:DomainSubset> <gml:BoundingBox crs="http://www.opengis.net/gml/srs/epsg.xml#26713"> <ows:LowerCorner>589980.0 4913700.0</ows:LowerCorner> <ows:UpperCorner>609000.0 4928010.0</ows:UpperCorner> </gml:BoundingBox> </wcs:DomainSubset> <wcs:Output format="image/tiff"/> </wcs:GetCoverage> </wps:Body> </wps:Reference> </wps:Input> <wps:Input> <ows:Identifier>levels</ows:Identifier> <wps:Data> <wps:LiteralData>1200</wps:LiteralData> </wps:Data> </wps:Input> </wps:DataInputs> <wps:ResponseForm> <wps:RawDataOutput mimeType="text/xml; subtype=wfs-collection/1.0"> <ows:Identifier>result</ows:Identifier> </wps:RawDataOutput> </wps:ResponseForm> </wps:Execute>
As we did in the wps section cut and paste the XML above into the
request.xmlfile, after having added two moreinput levels(1200,1400,1600) like below :<wps:Execute version="1.0.0" service="WPS" xmlns:xsi="http://www.w3.org/2001/XMLSchema-instance" xmlns="http://www.opengis.net/wps/1.0.0" xmlns:wfs="http://www.opengis.net/wfs" xmlns:wps="http://www.opengis.net/wps/1.0.0" xmlns:ows="http://www.opengis.net/ows/1.1" xmlns:gml="http://www.opengis.net/gml" xmlns:ogc="http://www.opengis.net/ogc" xmlns:wcs="http://www.opengis.net/wcs/1.1.1" xmlns:xlink="http://www.w3.org/1999/xlink" xsi:schemaLocation="http://www.opengis.net/wps/1.0.0 http://schemas.opengis.net/wps/1.0.0/wpsAll.xsd"> <ows:Identifier>gs:Contour</ows:Identifier> <wps:DataInputs> <wps:Input> <ows:Identifier>data</ows:Identifier> <wps:Reference mimeType="image/tiff" xlink:href="http://geoserver/wcs" method="POST"> <wps:Body> <wcs:GetCoverage service="WCS" version="1.1.1"> <ows:Identifier>geosolutions:dem</ows:Identifier> <wcs:DomainSubset> <gml:BoundingBox crs="http://www.opengis.net/gml/srs/epsg.xml#26713"> <ows:LowerCorner>589980.0 4913700.0</ows:LowerCorner> <ows:UpperCorner>609000.0 4928010.0</ows:UpperCorner> </gml:BoundingBox> </wcs:DomainSubset> <wcs:Output format="image/tiff"/> </wcs:GetCoverage> </wps:Body> </wps:Reference> </wps:Input> <wps:Input> <ows:Identifier>levels</ows:Identifier> <wps:Data> <wps:LiteralData>1200</wps:LiteralData> </wps:Data> </wps:Input> <wps:Input> <ows:Identifier>levels</ows:Identifier> <wps:Data> <wps:LiteralData>1400</wps:LiteralData> </wps:Data> </wps:Input> <wps:Input> <ows:Identifier>levels</ows:Identifier> <wps:Data> <wps:LiteralData>1600</wps:LiteralData> </wps:Data> </wps:Input> </wps:DataInputs> <wps:ResponseForm> <wps:RawDataOutput mimeType="text/xml; subtype=wfs-collection/1.0"> <ows:Identifier>result</ows:Identifier> </wps:RawDataOutput> </wps:ResponseForm> </wps:Execute>
Post the request using
curlin order to get back theDEM ContourFeatureCollection.curl -H "Content-type: xml" -X POST -d@request.xml http://localhost:8083/geoserver/wps -o response.xml