Process Chaining
GeoServer WPS implements also the Process Chaining. As the wording suggests, this is a method of “nesting” different processes inputs/outputs in order to get a chain of operations composing a unique more complex Process.
WPS Process Chaining is a way to:
- Feeding the output of a process into another process
- Allowing for tree-like composition
Lets see a couple of Process Chaining examples:
- Extract the rivers into the “restricted areas” polygons
- Extract the shape of the USA out of a raster, providing the
topp:statesFeatureCollection
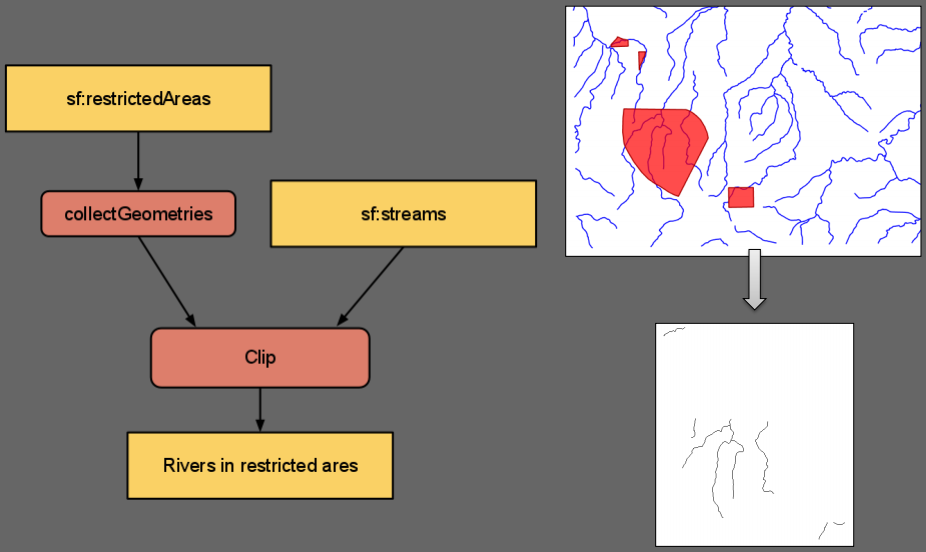
Chain 1: Extract the rivers into the “restricted areas” polygons
During this exercise we will perform a gs:Clip of the Vector Layer sf:streams against the FeatureCollection collected from the Vector Layer sf:restricted.
Vector clip and ship
Vector clip and ship
Once started the GeoServer Trunk on port 8085 (WPS - Startup the service section), go to the
Demo WPS Request Builderinterface, and selectgs:Clipfrom the firstcombo-box. Select the Vector Layersf:streamsas input.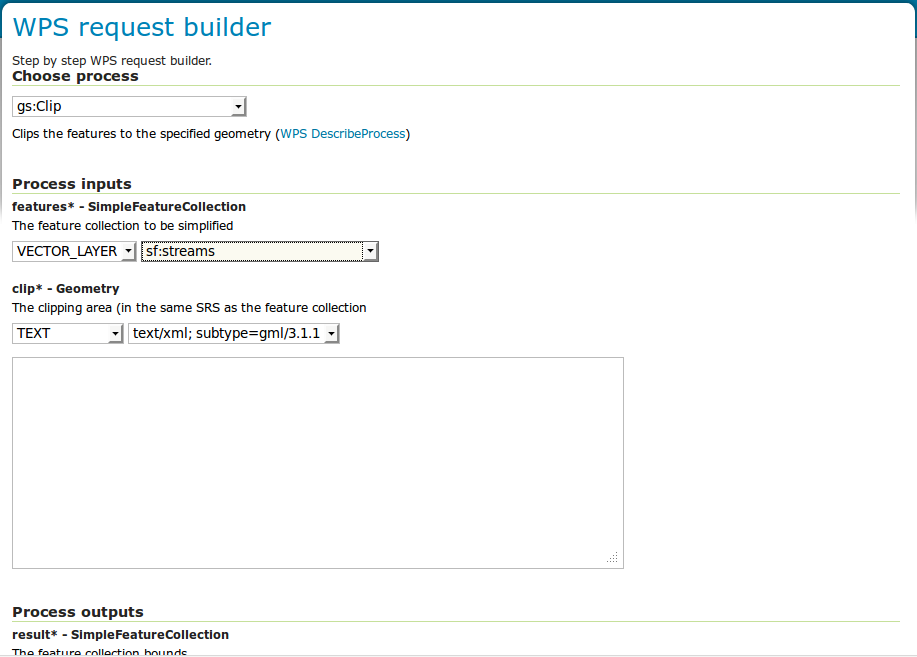
Now, for the
clipinput selectSUBPROCESSand then click onDefine/edit. Another WPS Builder dialog window should appear.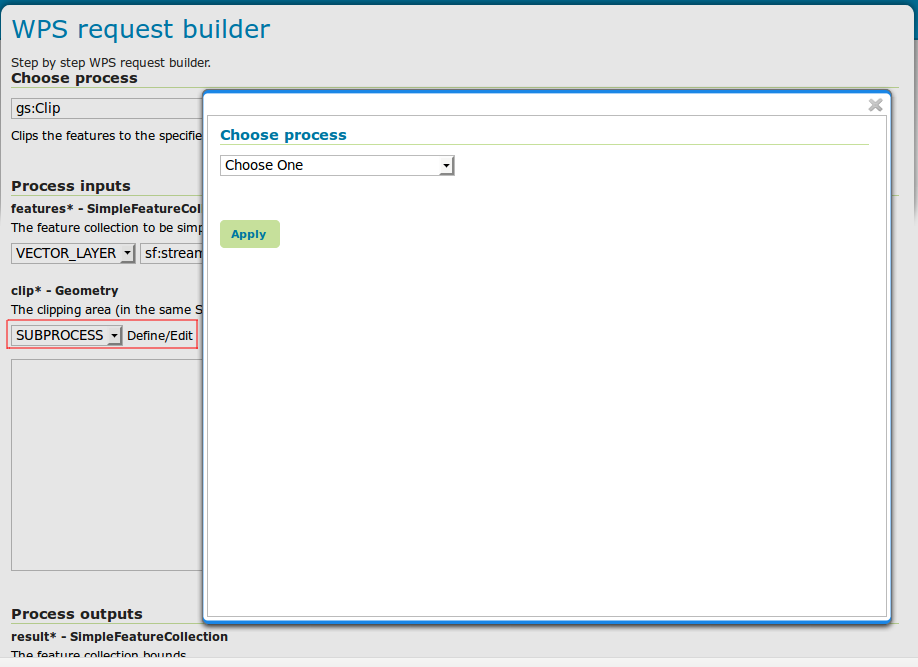
On the new WPS Browser window select the process
gs:CollectGeometriesusing the Vector Layersf:restricted, thenApply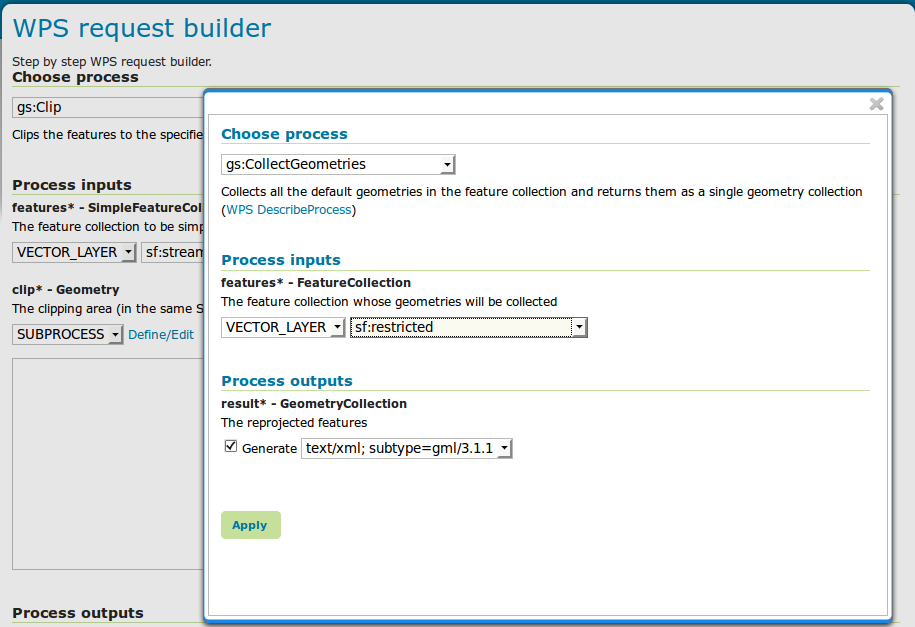
Finally select
application/zipas output format and thenExecute Process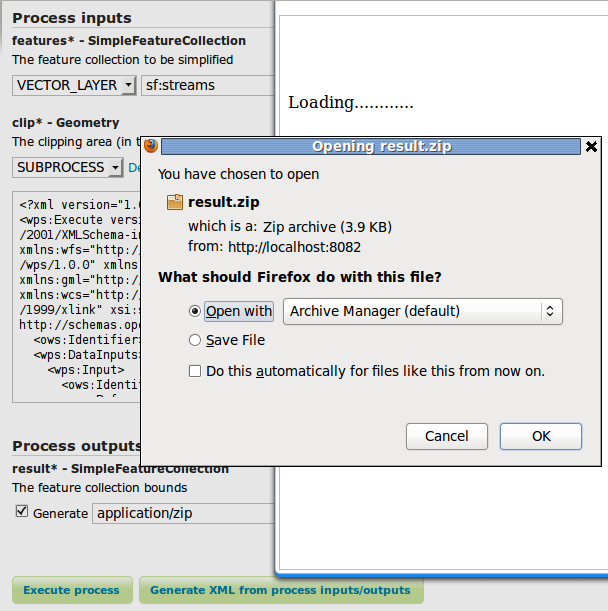
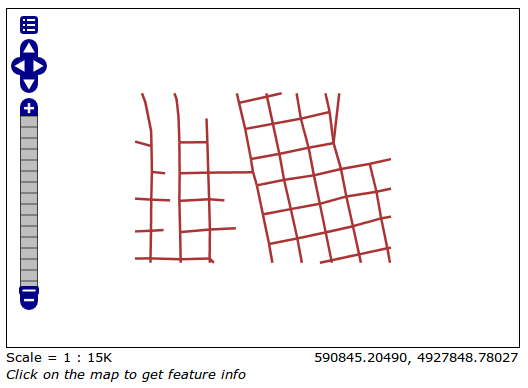
After few instants you will be able to download a zip file containing a shapefile. Open the latter using
uDigorQGisin order to inspect the outcomes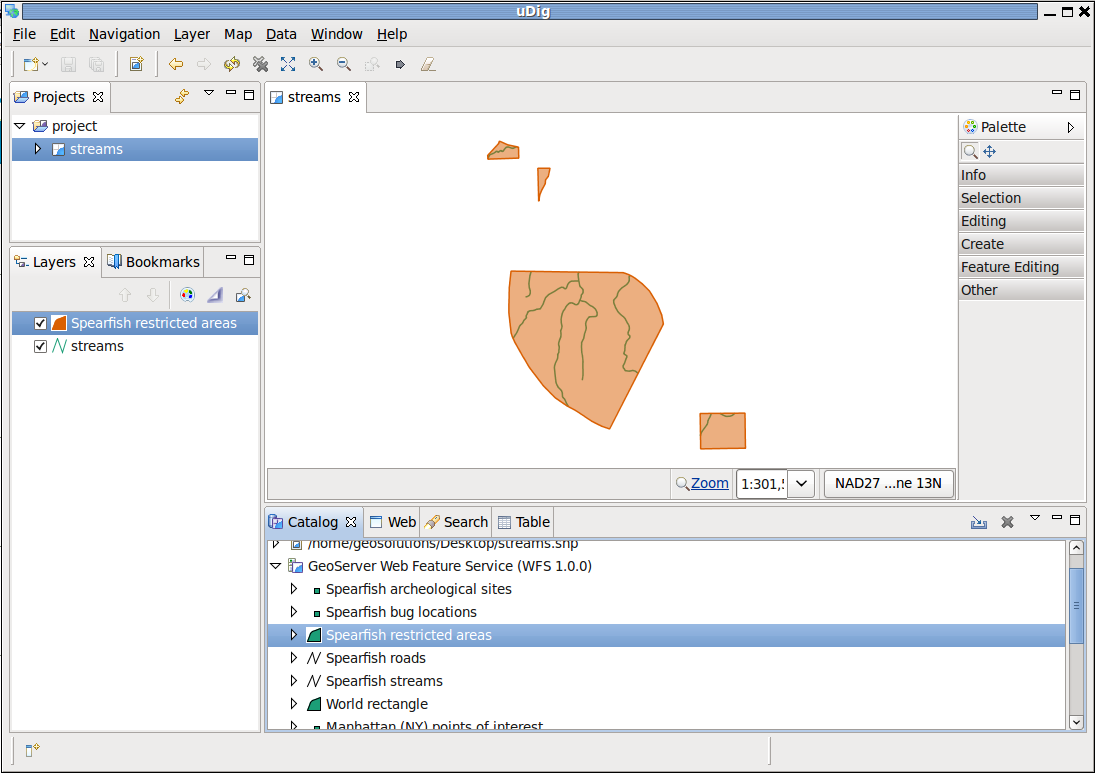
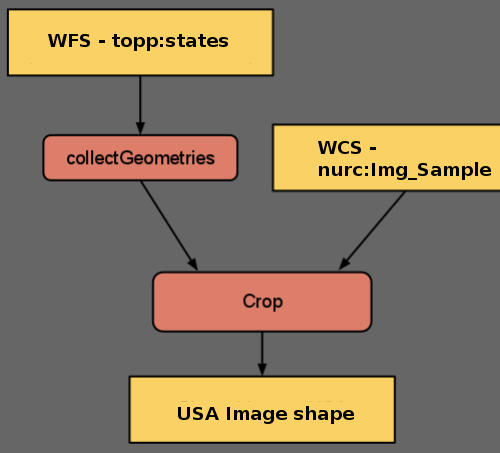
Chain 2: Extract the shape of the USA out of a raster, providing the topp:states FeatureCollection
During this exercise we will perform a gs:CropCoverage of the Raster Layer nurc:Img_Sample against the FeatureCollection collected from the Vector Layer topp:states.
Raster clip and ship
Raster clip and ship
Once started the GeoServer Trunk on port 8085 (WPS - Startup the service section), go to the
Demo WPS Request Builderinterface, and selectgs:CropCoveragefrom the firstcombo-box. Select the Raster Layernurc:Img_Sampleas input.
Now, for the
cropGeometryinput selectSUBPROCESSand then click onDefine/edit. Another WPS Builder dialog window should appear. On the new WPS Browser window select the processgs:CollectGeometriesusing the Vector Layertopp:states, thenApply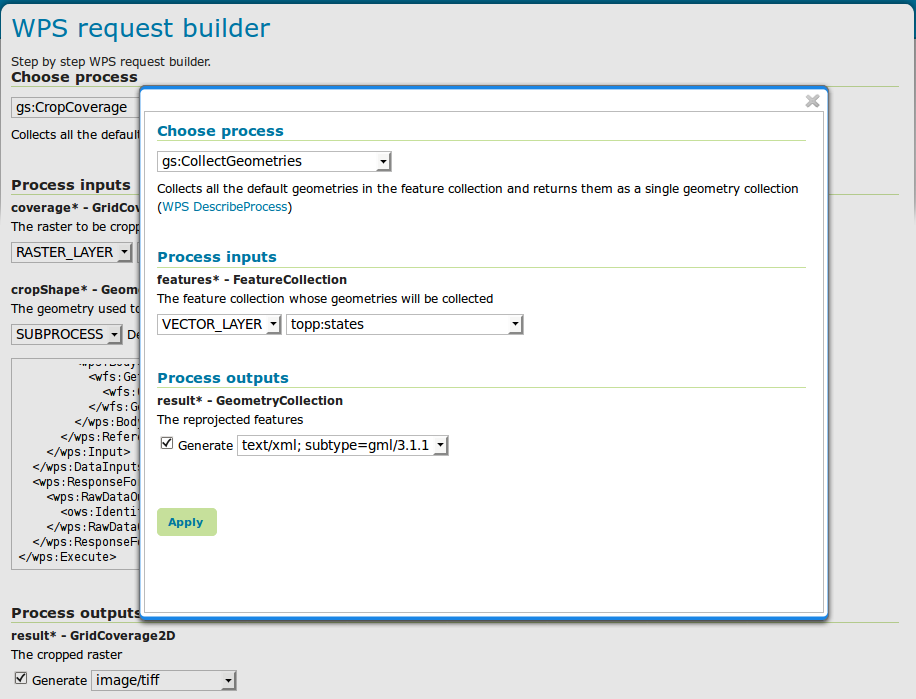
Leave
image/tiffas output format for the Process and proceed with theExecute Process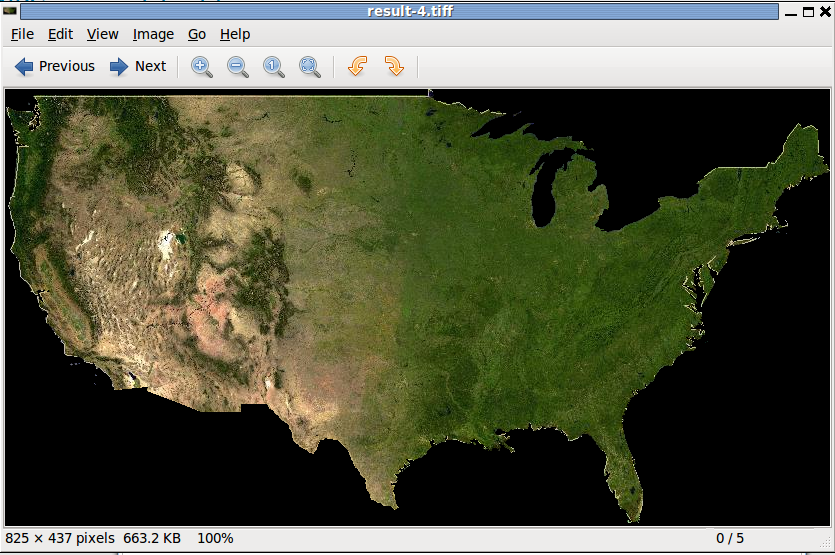
GeoServer “direct data integration” and “store Back”” capabilities throught gs:Import
Direct data integration
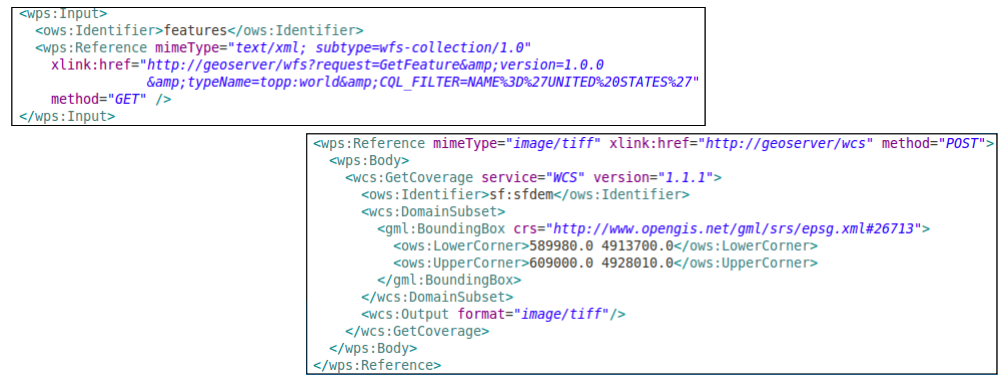
The WPS normally streams input data from remote WFS/WCS, parsing GML/GeoJSON or GeoTiff/ArcGrid. On the GeoServer implementation when the source is local we can dodge it though, read directly from the source (shapefile, DBMS, geotiff).
The following two special functions do the trick
http://geoserver/wfs; url for local WFS accesshttp://geoserver/wcs; url for local WCS access
Store Back`` with ``gs:Import``
The gs:Import WPS Process along with Process Chaining can be successfully used to store back the outcomes as new GeoServer resources/layers.
gs:Import saves the vector results into a store of choice, and publish as a layer. The new resource can be used right away from WMS/WFS/WCS/WPS.
Attention
At this time GeoServer still missing the equivalent for rasters.
As an example, we will now store back into GeoServer the layer of reduced sf:roads created in the section Vector Processes
Once started the GeoServer Trunk on port 8085 (WPS - Startup the service section), go to the
Demo WPS Request Builderinterface, and selectgs:Importfrom the firstcombo-box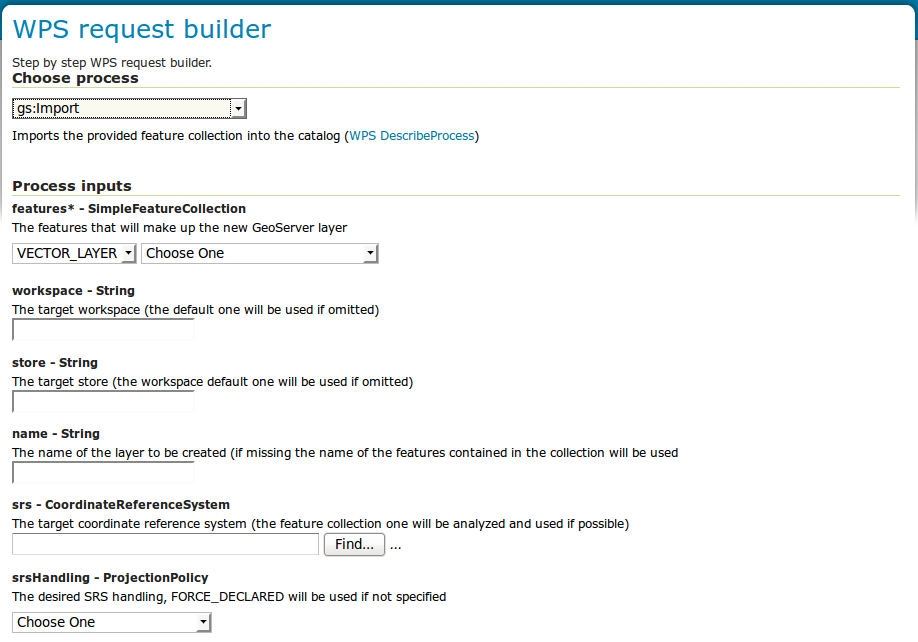
As input for
featuresselectSUBPROCESS, click onDetails/editand configure ags:ClipProcess on the Vector Layersf:roadsfollowing the steps at Vector Processes section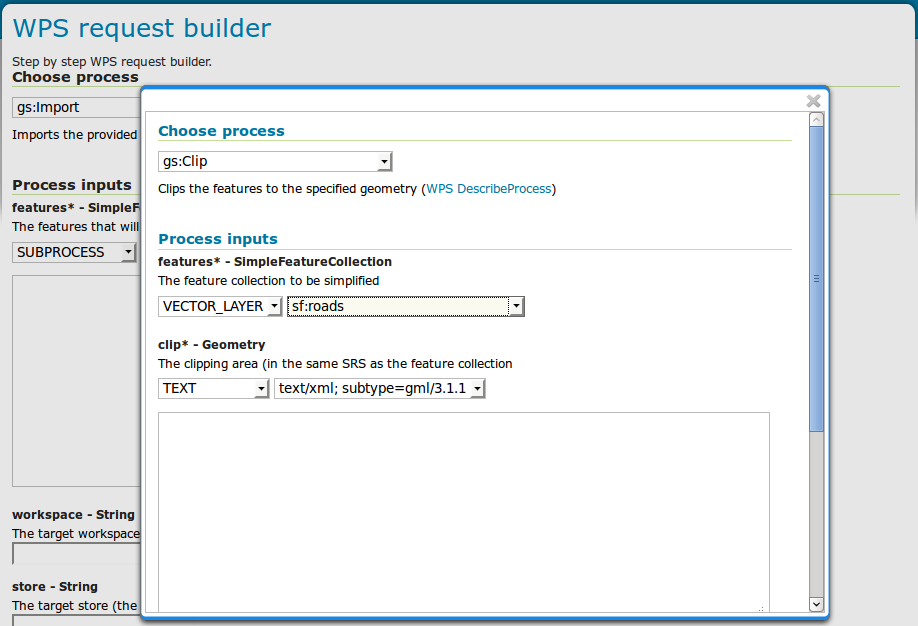
Attention
Don’t forget to specify the clipping geometry as WKT:
POLYGON((589800.30577 4927510.97152, 589800.30577 4926799.69435, 590874.57957 4926799.69435, 590874.57957 4927510.97152, 589800.30577 4927510.97152))
Click on
Applyin order to let the Demo WPS Builder insert the Execute Process XML of thegs:Clipchained sub-process into thetext-area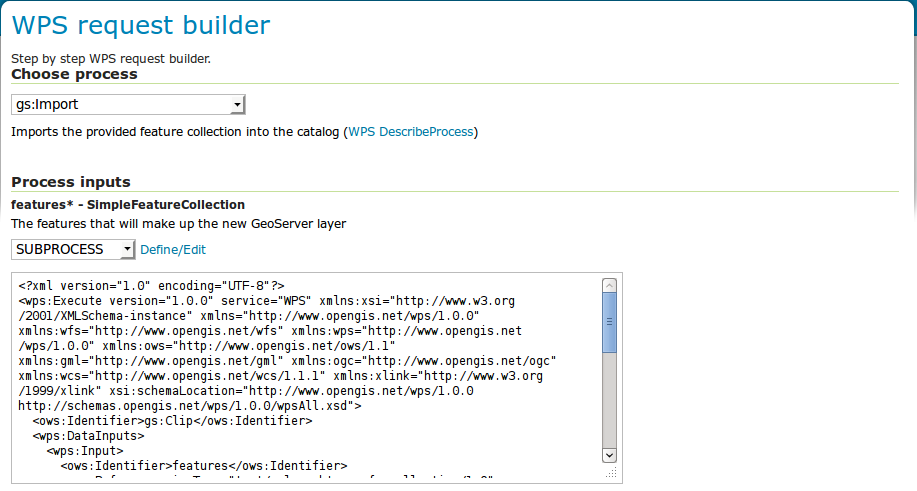
Fill in the other attributes
workspace; sfname; roads_clippedsrs; EPSG:26713 (thesf:roadsnative one)style; simple_roads (the default style to be assigned to the layer)
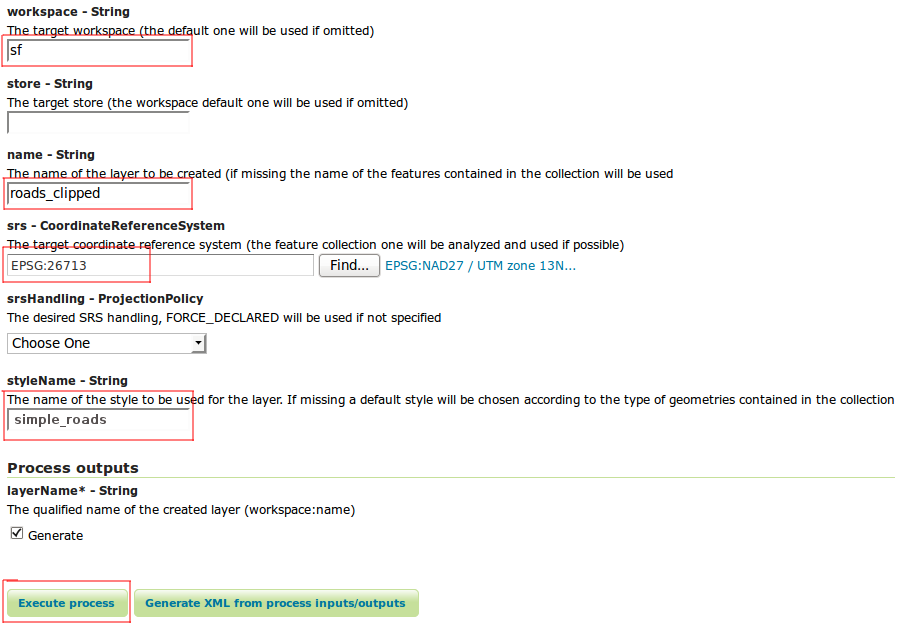
Click on the
Execute Processand when finished check throught the GeoServerLayer Previewthat the new layer has been created and is clipped